Mobirise Website Builder

BMW Clutch & Crank Oil Seal Replacement

This document describes a process for removing and inspecting the BMW clutch and flywheel, and replacing the main rear crank seal.
Work on the clutch is a fairly simple task once the gearbox has been removed.
The flywheel is slightly more complex and the use of some specialist tooling greatly assists in the job.

Mobirise Website Builder

The process described here was used to address and long term oil leak coming from the join between the engine and gearbox of my R60 BMW.
Oil in this area could come from 3 possible sources.
1) The crankshaft oil seal behind the flywheel.
2) An O-ring also behind the flywheel.
3) From the oil pump cover.
To address all three possible causes the parts shown here were purchased.
The crank seal was of the latest 'Scraper Seal' type; as BMW have made several improvements over the years.

Mobirise Website Builder

The process described here was used to address and long term oil leak coming from the join between the engine and gearbox of my R60 BMW.
Oil in this area could come from 3 possible sources.
1) The crankshaft oil seal behind the flywheel.
2) An O-ring also behind the flywheel.
3) From the oil pump cover.
To address all three possible causes the parts shown here were purchased.
The crank seal was of the latest 'Scraper Seal' type.

Mobirise Website Builder

Three of the six clutch retaining bolts should be removed and it's a good idea to marked one hole with Tipex to ensure parts would go back in the same relative location. Then the clutch let down bolts (BMW tool 21-2-600) can be inserted into these three empty holes.
With the the let down bolts providing support the three remaining original bolts can be removed.
Finally - the sleeves on the three let down bolts are unscrewed in turn, to progressively relieve the clutch spring tension.

Mobirise Website Builder

With the clutch parts removed the flywheel should be held in place with BMW locking tool (11-2-800).

With the tool in place one flywheel bolt was removed and the hole marked with Tipex once again.

Before the remaining bolts were undone the crank end float was supported as described below. This support is important to avoid extensive remedial work.


Mobirise Website Builder

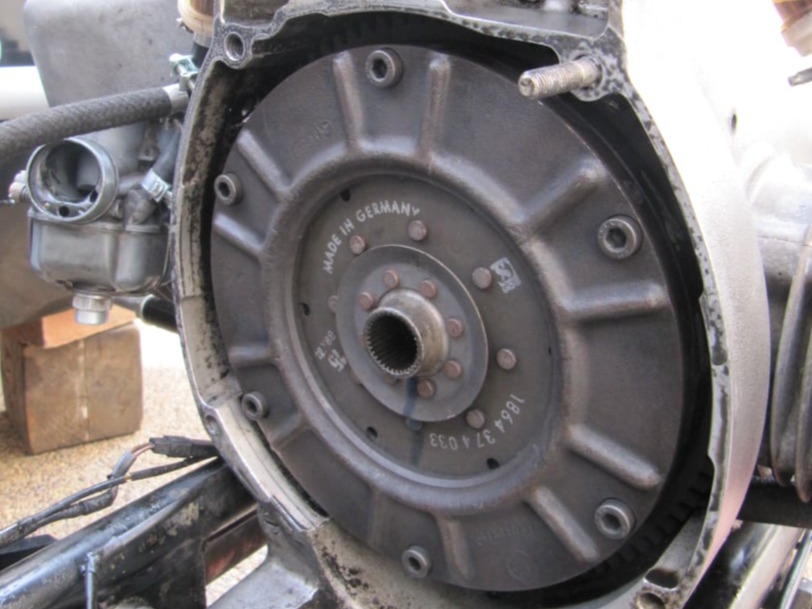
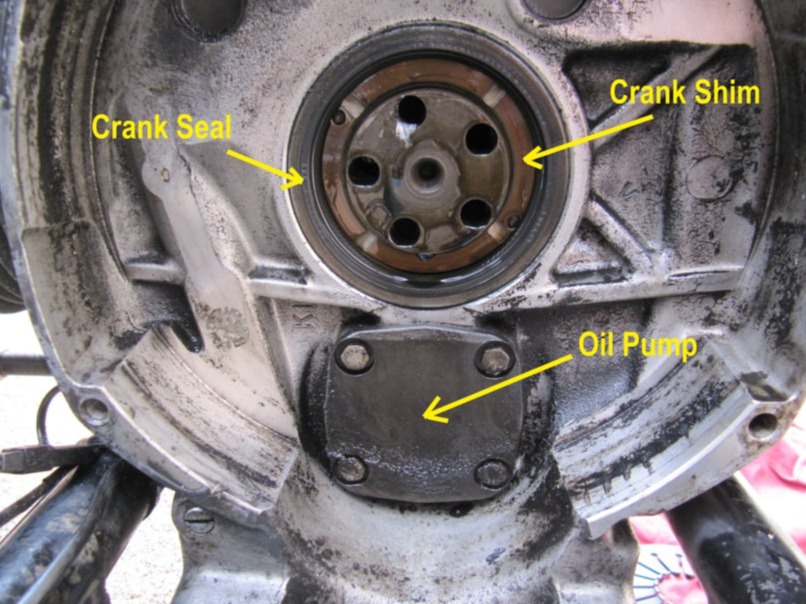
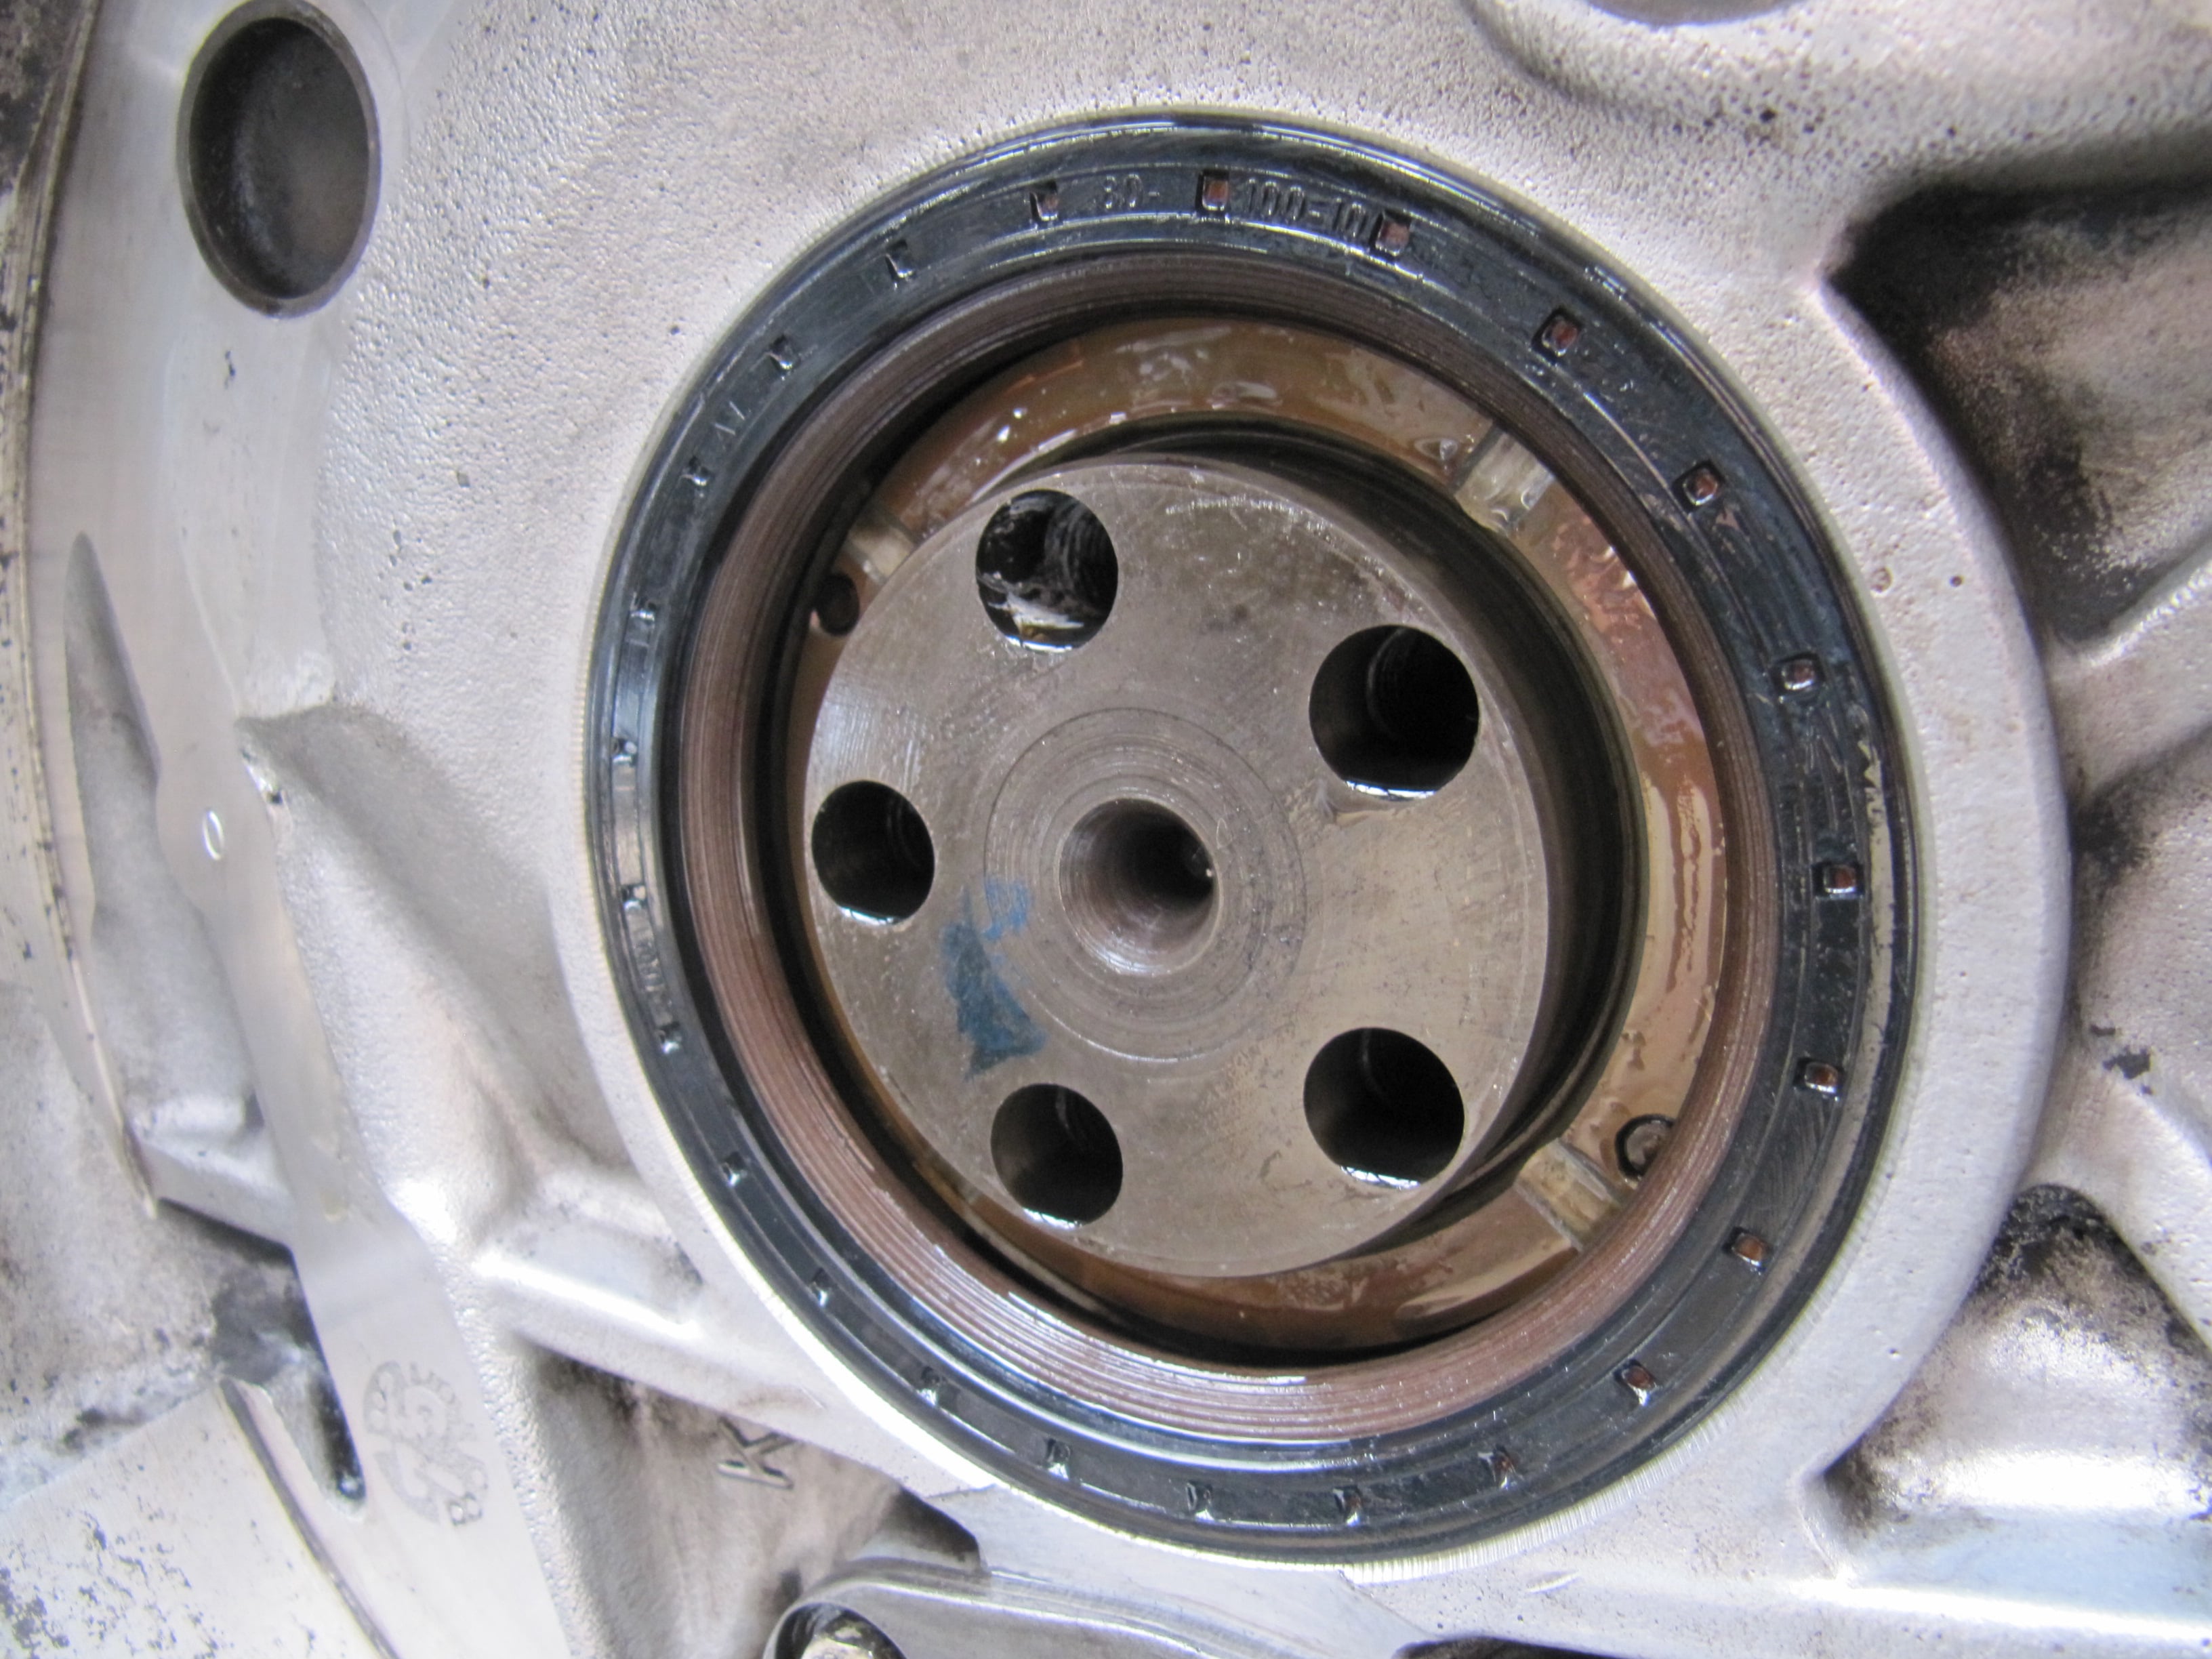
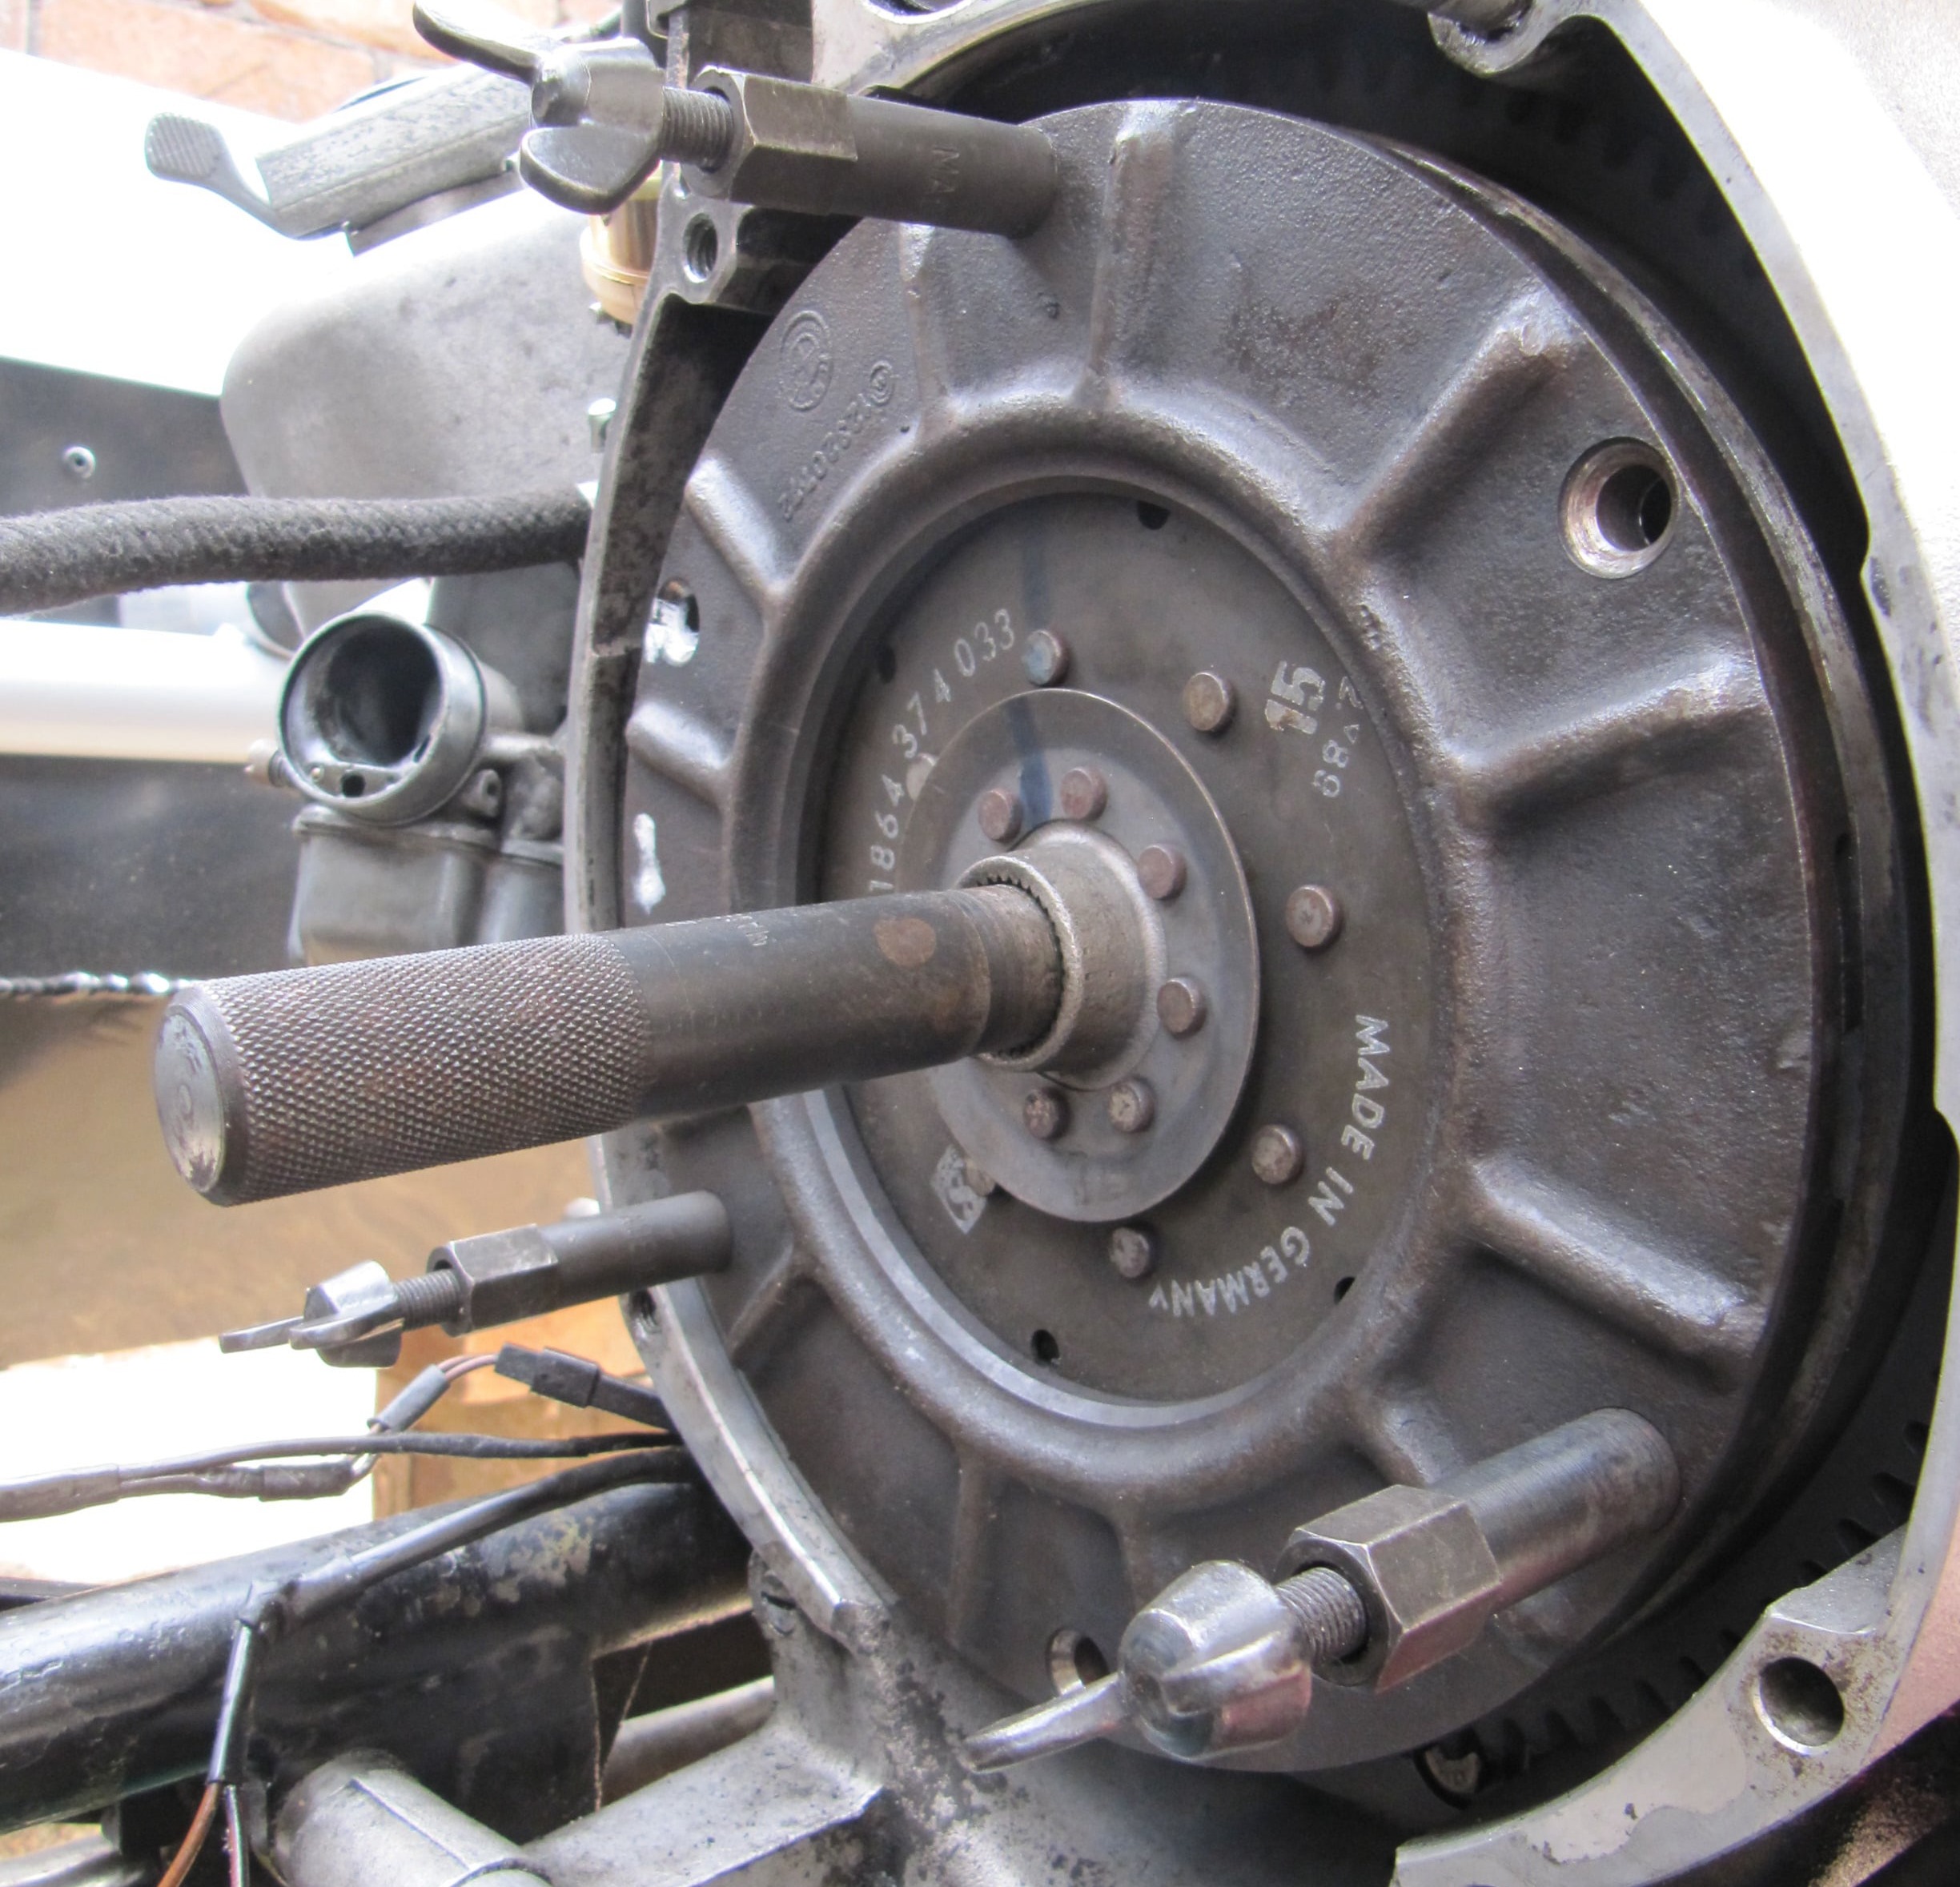
Caution: When the flywheel is removed it is possible for the crank to slide forward and if this happens bearing shims inside the rear engine cover can drop out of place. Refitting the shims is difficult without extensive strip down of the engine and failure to realise the shims have moved can lead to bigger problems. It is, therefore, worth taking steps to ensure the crank cannot slide forward.

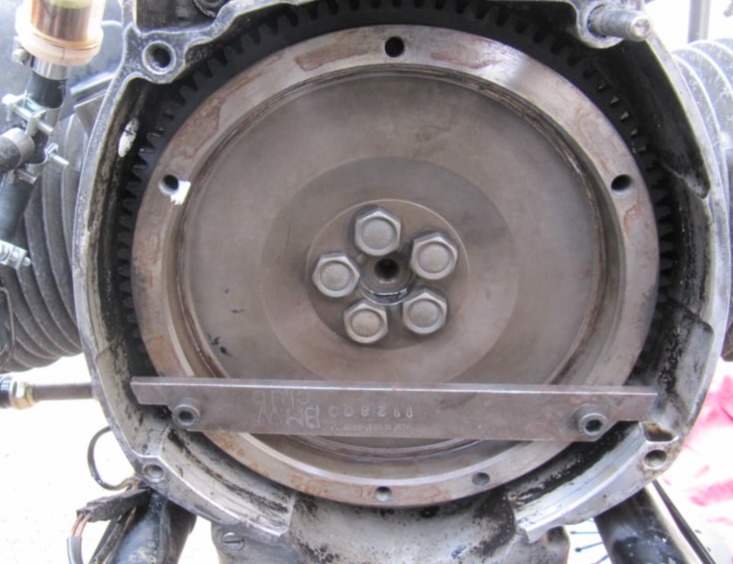
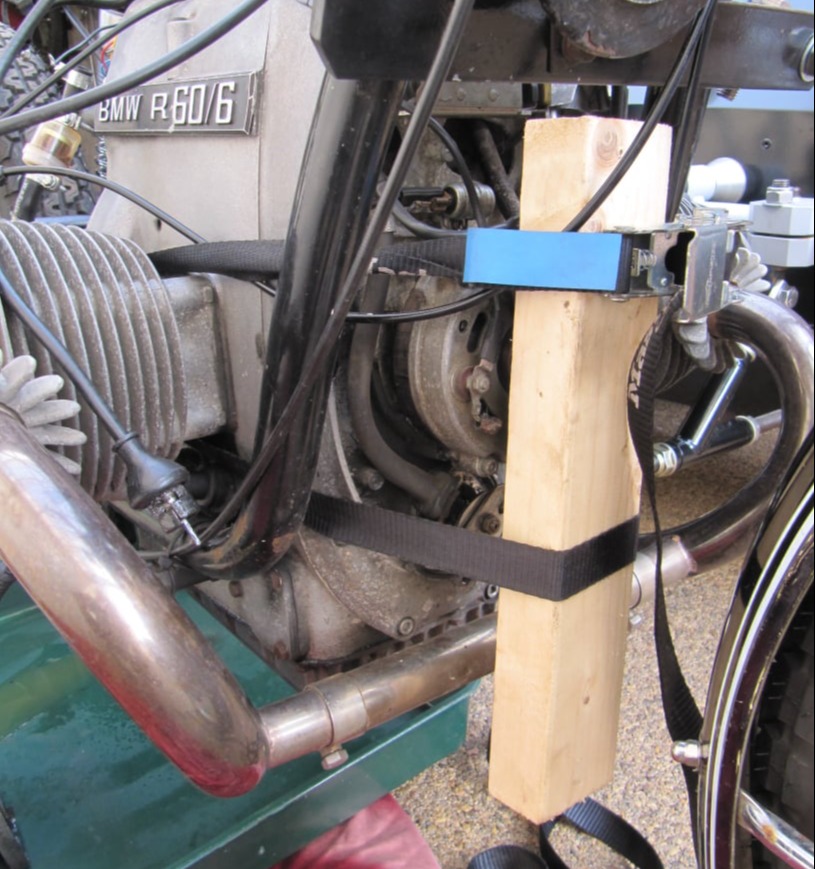
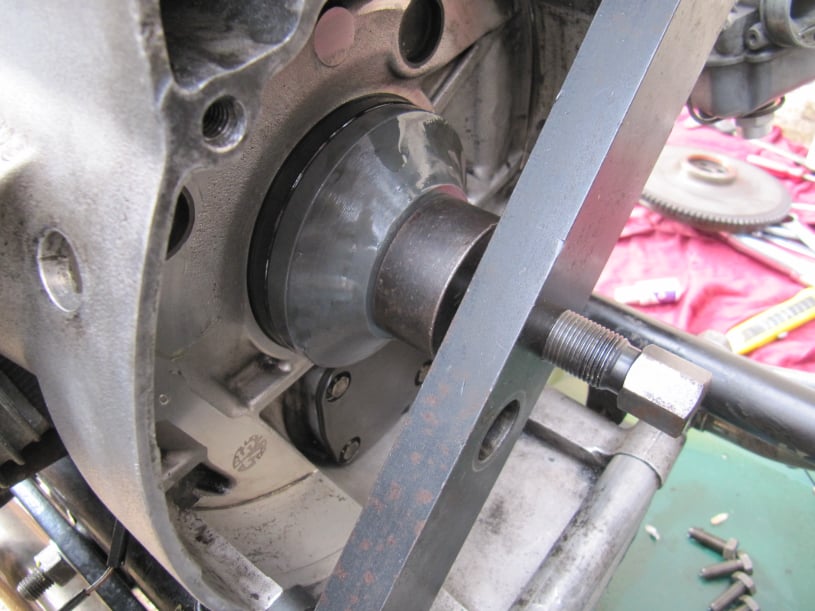
To prevent crank movement, the engine front cover should be removed and a block of wood and a ratchet strap used as shown. The wood should be positioned to press on the end of the alternator bolt.
Only moderate tension of the strap is required.

Warning: The Battery should be disconnected before removing the engine front cover. It is all too easy to cause a short on the regulator board by touching it with the cover which can cause expensive damage.

Mobirise Website Builder

With the flywheel removed The Crank shim (1), the Crank Seal (2) and the oil pump cover (3) are accessible.

Mobirise Website Builder

BMW tool 11-1-890 should be mounted across the bell housing as shown to both remove and install the crank shaft seal.

Mobirise Website Builder

Photo of the tool removing the crank seal.

Mobirise Website Builder

To remove the old seal; the off centre hole of the tool is used. This takes a threaded part with a foot on the end. The foot is turned to dig into the edge of the old seal and then the threaded rod pulled, with the free spinning nut, to slowly extract the seal from the housing.
The bulletin shown here from the BMW manual shows the process in more detail and also the fact that cutting the lip from the old seal can make the process easier.

Mobirise Website Builder

The image above shows the bell housing cleaned up and both the crank seal and oil pump cover removed.

Mobirise Website Builder

The oil pump can have a new O-ring fitted.

Mobirise Website Builder

The new crank seal was soaked in oil for 30 minutes to soften it up.
Then it was pushed onto the insertion tool as shown.
For this bike the insertion tool had to be used with an additional spacer to ensure the correct position of the seal.

Mobirise Website Builder

BMW tool 11-1-890 can then be used with the central hole, to push the seal into the engine case.

Mobirise Website Builder

Image showing the new seal correctly installed.
Note the orientation with the open end facing the front of the engine.

Mobirise Website Builder

The Flywheel should be fitted with a new O-ring and be re-fitted using new stretch bolts torqued up to 44lbft.
Clutch fitting was the reverse of removal with the wind down bolts being used to compress the spring and then new stretch bolts were inserted and torqued to 17lbft.
BMW tool 21-2-650 was used to centre the friction plate.

Landing Page Software